
Summary
This lesson introduces young students to the concept of maps as representations of places and gives students the opportunity to explore and learn why and how people use maps. Particular focus is on where the students are located in relationship to the world around them. This concept is introduced using the book "Me on the Map" by Joan Sweeney. Students create a classroom map and practice using the language of location to move around using their maps.
Essential Question(s)
How can understanding physical features help you describe your surroundings? Why is knowing about maps and globes important?
Snapshot
Engage
Students share what they know about maps and complete a KWL chart.
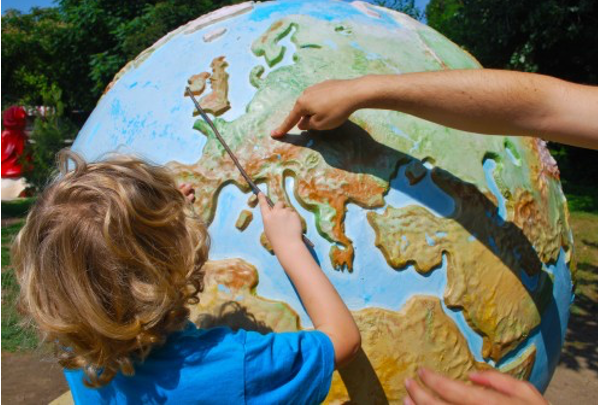
Explore
Students discover what a map looks like by exploring a variety of maps. The main focus is on discovering that maps have symbols, colors, lines, titles,directions, shapes and they are about places. Additions are added to the K and the W of the KWL chart.
Explain
The book, “Me on the Map” is read to the children. After a discussion of the book students follow the reverse sequence of the book at look again at the maps previously explored. They try to locate their continent, country, state, and town. Specific vocabulary words are introduced and emphasized at this time.
Extend
Students make a map of the classroom and use the language of location (inside, next to, between, above, below, near) to practice using the map. Learnings are added to the KWL chart.
Evaluate
Students create class books showing maps and drawings of where they live. Students make these books either in groups or individually.
Materials
Different kinds of maps (state, country, world, folded, wall, brochures, Google Earth, a globe, maps on iPad/computer and etc…)
Book “Me on the Map” by Joan Sweeney or storybook video
Large poster or paper for creating the KWL chart and classroom map
Crayons, scissors, glue, tape and pencils
Engage
Start the lesson by asking students if they know what a map is? As students share what they know, build your questions from their responses.
Start the What We Know About Maps KWL chart by writing in the Know column things your class knows and agrees on about maps. ( You want the KWL chart to reflect accurate information, so if students offer incorrect information it is okay to record that information but mark it with a ? so students will know that this fact needs some checking.
Vocabulary: maps
Explore
Students will discover what a map looks like by exploring a variety of maps. Some students will be able to read names of towns, and directions but at this grade level the main focus is discovering that maps have symbols, colors, lines, titles, directions, shapes and are about places.
Place the maps around the room, (on tables, the floor or in the center of a circle). Encourage students to look and just see what they can find on the maps. As you walk around the room listen to their findings and prompt students to explore more by explaining the meaning of specific symbols. Such as, the blue lines are rivers, green trees mean there is a forest, blue ovals might be lakes, and so on…..
Pull the class back together and discuss the groups findings. You can add some of these to the Know column of the KWL chart. Then move on to helping the class formulate a few questions for the What I Want to Know column.
Introduce the globe as a model of the Earth. Tell students that a globe is similar to a map, and shows some of the same things but a map is a drawing of a place and a globe is a model.
Vocabulary- map, symbols, globe, Earth
Explain
Read to the class the book, “Me on the Map” or watch the video of the book being read. It is recommended that the book be read more than one time so you can pause for discussion and talk about each map.
While reading the book ask students questions about the character in the story and in what ways the character is like them. Then introduce the concept of how the character is going from a small location (her bedroom) to a very large location, the Earth.
Follow the reverse sequence of the book as you have students search the previously explored maps to locate their continent, country, state, and town.
Discuss and post vocabulary: cartographer, map, globe, state, country, city, continent.
Extend
Review the purpose(s) of a map by explaining that a map shows where things are located. Emphasize that a simple map of the classroom is a small model that represents something that is really much larger.
Show students the shape of the classroom drawn on bulletin board paper. Start with one wall and ask: What are these boxes or openings for? (door[s], windows) Then use a cutout or a drawing of an item and have students decide which item in the class it looks like. Use the language of location (inside, next to, between, above, below, near) to talk about where it is located in the room, and then place the shape in the correct location on the map. Talk about and count other items in the classroom that could be included on the map, such as computers, desks, bookshelves, or chairs.
You can complete the map as whole class or assign groups of students to map sections or walls of the classroom.
Evaluate
Assessment as Learning
Students create class books showing maps and drawings of where they live. You can do this by groups or each student can make their own book.
Book pages should include both drawings and captions.
Resources
K20 Center. (n.d.). KWHL graphic organizer. Strategies. https://learn.k20center.ou.edu/strategy/127
Your Child Learns about Maps http://www.yourchildlearns.com/megamaps.htm
Zest2Teach. (2021, March 31). Me on the Map [Video]. YouTube. https://www.youtube.com/watch?v=vhjTB0GIENw