
Summary
In this lesson, students learn about primary sources by creating their own "Show and Tell Museum." They will practice reading and interpreting artifacts from their classmates' lives. They will then apply this knowledge to primary sources from Oklahoma's Early Native American tribes.
Essential Question(s)
How can we use primary sources to learn about people who lived long ago?
Snapshot
Engage
Students become detectives, using reasoning skills to determine what a set of personal objects has in common. The personal artifact will tell students something about the teacher’s life.
Explore
Students explore artifacts selected by their peers and displayed in a "Show and Tell Museum." They use the strategy "I Notice / I Wonder" to make observations and draw conclusions.
Explain
Students use the strategy "Mind Mapping" as they discuss how personal items or artifacts can also help us learn about people who lived long ago. They learn that archaeologists and historians are people who study and interpret these artifacts or "primary sources."
Extend
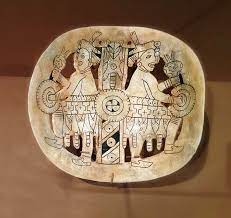
Students use their own background knowledge and observations to interpret pictures of artifacts from early Native Americans of Oklahoma.
Evaluate
Students journal about their experience.
Materials
Teacher Show and Tell items (see the Engage section for more details)
Notepads or note paper and pencils
Magnifying glasses (optional)
Flashlights (optional)
3-6 Show and Tell items from each student
Chart paper and colored markers
Index cards
Lesson Slides
Copies of Native American Artifact Cards (attached)
Engage
Prior to the lesson, place objects that represent your own life or a cultural period around the classroom. Objects should be "show and tell" type items that reflect your traditions, values, work life, family life, and personal hobbies. Items chosen might include awards, trophies, books, tools used for work or hobbies, family photographs, souvenirs, postcards, letters, or artwork.
As students enter the room, explain that they will assume the role of detective. Allow time for students to look at the objects placed around the room and to think about what all of these objects might have in common. Give the students time to look around and ask them to discuss what they notice.
To conclude the tour, bring students back together and have them share their observations. They should begin to understand that all of the objects are from you, the teacher, or from a particular cultural period. It they struggle with the concept, give them some clues to guide them toward that conclusion. Ask them what they have learned about your life (or the period of time represented by the objects) by looking at these objects.
Show Essential Question found on slide 3: What do personal objects tell us about the people who use them? Following the Essential Question, review the Lesson Objectives on slide 4:
Examine personal objects and determine the "message" they send about the people who own them.
What cultural information can be discovered through the study of artifacts?
Show slide 5 before students start their examination to ensure they understand the task.
Explore
On "Show and Tell Museum" Day, ask students to set up a "Show and Tell" exhibit. The purpose of the display is to learn more about each others’ lives or the historical period they are replicating.
This is a great time to introduce and use the vocabulary word "artifact" to describe an object made by a human being, typically an item of cultural or historical interest.
Give students time to set up a small "exhibit" at their desk or table. If you have time, show some pictures of museum exhibits as examples and let them make a sign for their personal artifacts.
Shows slide 6 before they begin their tour. After students have prepared their exhibits, explain that they will now tour the classroom museum. They should use a notebook or notebook paper to record their observations, using the I Notice/I Wonder strategy. Assign each student 2-3 exhibits to record notes on. Explain that they may investigate the other exhibits if they have time.
Explain
Discuss with the following question with students:
"We have learned more about each other through our classroom museum and by investigating artifacts from each other’s lives. Could we also use artifacts to learn about people who lived long ago?"
Use the strategy Think-Pair-Share to encourage discussion and brainstorming. As partner groups share out, record class thinking on a Mind Map on chart paper. The central question should be, "How can we learn about people who lived long ago?"
To complete a Mind Map, follow the steps below:
Provide students with a blank sheet of paper and colored markers or pencils.
Have students write and circle the main idea of the content in the center of the page.
Ask students to branch out from the center of the page with more ideas that elaborate on the main idea.
Encourage students to use a variety of colors and a combination of words, pictures. and symbols.
Have students connect related ideas with arrows and lines.
Show slide 7 to prompt discussion. Students may discuss ideas like "use the internet" or "check out books from the library."
Encourage them to think more deeply. How did and do we obtain that information? What types of objects or artifacts could we look at to discover more about people who lived a long time ago? Record their ideas on the Mind Map.
Review the vocabulary word "artifact" and explain that sometimes people who lived long ago left behind artifacts which were man-made objects that give us a glimpse into how they lived.
Just as we looked at artifacts from our peers, archaeologists and historians study artifacts to learn about groups of people who lived hundreds or even thousands of years ago. They use background information and clues from the artifact to draw conclusions about the people who made them.
These artifacts are "primary sources" - original objects or documents from a certain time period. They may include buildings, photographs, tools, weapons, artwork, jewelry, clothing, journals, letters, toys and games. Just as we toured our "Show and Tell Museum," we can visit a historical museum (in person or online) to see artifacts from people who lived long ago.
Extend
Show slide 8: How Do Archeologists Work? Discuss the word artifact.
Quickly run through slides 9-22 to orient group about their task. Group students into teams of 2-4. Give each team a set of the attached Native American Artifact Cards. Explain that these cards show primary sources from early Native American tribes in Oklahoma. Teams work together to create a "label card" for at least 5 of the artifacts. Students can use index cards for this. Each label should include:
A name for the artifact
What they think the artifact is made of
What they think the artifact was used for
What the artifact tells us about the people who created it
What questions they have about the artifact
Evaluate
Show slide 23. Evaluate the label cards students created for the Native American Artifact Cards they investigated. Was information complete? Did they look carefully at the details of the artifact? Do their conclusions make sense?
To encourage student reflection, close the activity by having students journal about their experience. Some writing prompts you could give might be include the following:
Was it easier to investigate artifacts from your peers or from the artifact cards? Why?
Did your team all agree on what to write on the label cards? Why or why not?
Do you think archaeologists / historians all agree when investigating an artifact?
What information could have helped you with labeling your artifacts?
Opportunities for Advanced Learners
Students work in groups or pairs to create a mobile exhibit about a topic they are interested in. Students should have both choices of the topics to be researched, and the mode of presentation. They may want to videotape their presentation, create a slide presentation, or use a tri-fold board. They may also want to record themselves speaking and use Q-codes to enable access by other students.
Resources
Floch, Q. (n.d.). Sam Noble Museum. Oklahoma’s museum of natural history. Discovery kits. https://samnoblemuseum.ou.edu/education-2/discovery-kits/
K20 Center. (n.d.). I notice / I wonder. Strategies. https://learn.k20center.ou.edu/strategy/180
K20 Center. (n.d.). Think-pair-share. Strategies. https://learn.k20center.ou.edu/strategy/139
K20 Center. (n.d.). Mind map. Strategies. https://learn.k20center.ou.edu/strategy/1277
Ladd-Taylor, M, Ingra, A., & Seidman, R. (2021, March 25). "How to analyze a primary source." https://www.carleton.edu/history/resources/history-study-guides/primary/
Library of Congress. (n.d.). "Getting started with primary sources." Webpage. https://www.loc.gov/programs/teachers/getting-started-with-primary-sources/
SciShow Kids. (2015, December 2). "Solving mysteries with archaeologists!" [Video]. Youtube. https://www.youtube.com/watch?v=zOJlCdMvWAI&t=158s