
Summary
Students will use two-dimensional (2-D) figures and nets to explore three-dimensional (3-D) figures and will talk about how 3-D figures combine to create sculptures.
Essential Question(s)
How can we describe our world using 3-D shapes?
Snapshot
Engage
Students will use a Honeycomb Harvest strategy to sort 2-D and 3-D figures and discuss how they are connected.
Explore
Students will work with the nets of 3-D figures and then add nets to their Honeycomb Harvest sorts.
Explain
Using a notes document and a Jigsaw strategy, students will describe 3-D figures using the terms "faces," "vertices," and "edges."
Extend
Students will explore different examples of sculptures and will create their own 3-D sculpture using modeling clay.
Evaluate
Students will compare two or three 3-D shapes using a Venn diagram.
Materials
Hexagon cards for the Honeycomb Harvest activity (cut out, sorted, and placed in envelopes)
3-D Shape Nets document
Tape
3-D Shapes Note Page
Modeling clay
Engage
Have students form small groups. Pass out a set of 2-D and 3-D shape cards to each group. Students will use the Honeycomb Harvest strategy to sort the 2-D and 3-D shapes in a way that makes sense to them.
Have students conduct a Gallery Walk to see how other groups organized their cards. Have students keep the honeycombs on the table as-is—they will work with them again in the Explore activity.
As a class, discuss student observations. Talk about similarities and differences in the shapes. Talk about how some shapes can be categorized into multiple categories.
Explore
Pass out a copy of the 3-D Shape Nets handouts to each group. Have students work in their small groups to cut, fold, and assemble the various nets. Students can use tape to hold the structures in place.
Give students the additional 3-D net honeycomb cards and have them add to or re-sort their honeycombs to include these cards.
As a class, discuss how students made changes to their shape sorts.
Explain
Provide each student with a copy of the 3-D Shapes Note Page. Students will use this page to complete the Explain portion of the lesson and can use it as a resource later.
Looking at a 3-D figure, have students think about the vocabulary words "faces," "vertices," and "edges." In their small groups, have them create a definition for each of the words. As a class, share the definitions and determine a class definition for each word.
Using the Jigsaw strategy, have students work in pairs or small groups to examine one of the 3-D shapes listed on the notes page: rectangular pyramid, triangular prism, cube, or cylinder.
Allow students to determine the number of faces, vertices, and edges. Students should also brainstorm some real-world examples of the shape.
Have students share the information with the class and fill in the details on their notes page.
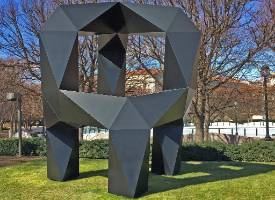
Extend
Show students a picture of a sculpture. You can find some examples of pre-Columbian pieces here, or use a sculpture from your local area. Have students identify various 3-D shapes that have been used to make the sculpture.
Have students use modeling clay to create their own sculpture by combining 3-D shapes.
Allow students to share their sculptures and describe the various shapes they used to create them. Encourage students to describe the faces, edges, and vertices.
Evaluate
Ask students to choose two 3-D shapes and create a Venn diagram to help them describe how they are related. For an extra challenge students could choose three 3-D shapes to compare in a three-ring Venn diagram.
Resources
Denver Art Museum (n.d.) Pre-Columbian art. Collections. Retrieved from https://denverartmuseum.org/collections/pre-columbian-art
K20 Center. (n.d.). Gallery walk / carousel. Strategies. Retrieved from https://learn.k20center.ou.edu/strategy/d9908066f654727934df7bf4f505a54d
K20 Center. (n.d.). Honeycomb harvest. Strategies. Retrieved from https://learn.k20center.ou.edu/strategy/6f19b778b73e4c339d1a7d9653001825
K20 Center. (n.d.). Jigsaw. Strategies. Retrieved from https://learn.k20center.ou.edu/strategy/d9908066f654727934df7bf4f507c1b8
Sculpture at the River Market (n.d.). Take a virtual tour. Retrieved from http://sculptureattherivermarket.com/?page_id=1380