
Summary
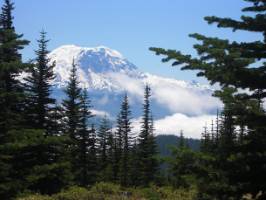
In this lesson, students will analyze a variety of world maps to determine patterns in plate tectonics, earthquakes, volcanic activity, and mountain ranges.
Essential Question(s)
Where on Earth are earthquakes, volcanoes, and mountains found?
Snapshot
Engage: Students make observations of a natural phenomenon.
Explore: Students read about different information that maps can show and analyze a variety of maps to find patterns in the earth's surface.
Explain: Students use their reading to analyze a map to find patterns in the earth's surface and determine how earthquakes, volcanic activity, and mountain ranges are connected.
Extend: Students reflect on a video of a geologist discussing his job and how it applies to the topic.
Evaluate: Students revisit the phenomena from Engage and make sense of it using information gained in the lesson.
Materials
Lesson Slides (attached)
Maps Show Patterns on Earth reading (attached; one per student)
Patterns on Earth's Surface (attached; one per student)
Blank paper
Construction paper (optional)
Glue/Tape (optional)
Computer
Projector
WiFi
Engage
Begin the lesson by sharing the title slide on slide 2. Let students know that they are spending the day looking for patterns in the earth's surface by analyzing a variety of world maps.
Explain to students that they will be participating in an instructional activity called First Word, Last Word. Instruct them to think about one word that comes to mind when they watch the video that focuses on the topic being taught. This becomes the "first word" which they will use in a few minutes.
Display slide 3 and play the video of Incredible Krakatoa volcano eruptions at night.
Ask your students to share some of the words that come to their mind. As they are sharing, write these words onto the board. This serves as a bank for students who may struggle to come up with words on their own.
Display slide 4 or 5 (depending on the ability levels of your students) and hand out a sheet of paper for the First Word, Last Word activity. Using the word students came up with that relates to the topic, have students do the following:
Students write the first word vertically on the left side of the page.
Students complete an acrostic poem using the first word. Encourage them to use full sentences in their responses, rather than single words.
Collect the acrostics and save them for later. Let your students know that they will use them again at the end of the lesson.
Display slide 6, and share the Essential Question: Where on Earth are earthquakes, volcanoes, and mountains found?
Display slide 7, and share the Learning Objectives:
Students will recognize that maps help you visualize the locations of earthquakes, volcanoes, and mountains on Earth.
Students will understand that mountains form when rock pushes against other rock, which also causes earthquakes.
Students will analyze a variety of maps and deducing that earthquakes, volcanoes, and mountains tend to be found in the same locations.
Explore
Display slide 8 and pass out the attached interactive reading packet, Maps Show Patterns on Earth. Inform students that as they read the information, they should interact with maps to "show what they know" from the information they read. In the reading, students explore a basic topographical map of the United States, a map from the U.S. Geological Survey (USGS) which details earthquake activity in a 30-day period, a map that shows all active volcanoes and the oceanic spreading ridge, and a topographical map of the world that highlights mountain ranges.
Take a minute to point out some of the academic vocabulary in the lesson that your students may have difficulty with. These words have been highlighted bold in the text. Share the definitions on a word wall, or display the definitions for students to see while reading using slides 8-14.
Explain
Once students have completed the reading, share the map with them by displaying slide 16. This topographical map from the USGS shows land formations, active volcanoes, and global earthquakes that occurred from 1900-2013.
Tell students to use this map, the reading, and the activity completed during the Explore phase of the lesson to compare and contrast the patterns they see in mountain formations, earthquake activity, and volcanic activity.
Pass out the attached Patterns on Earth's Surface handout to each student. Point out that the map on their page is the same that's on the board. Instruct them to use the Venn Diagram to help keep the information organized.
Display slides 17-21 to show students how to properly fill in their Venn Diagram.
Once your students have completed their Venn diagrams, have them compare their work with an elbow partner or table group. They can use this time to add information to their own diagram, or make revisions based on peer feedback.
Extend
Display slide 22 and inform your students that they are going to hear from a real life geologist who works in Oklahoma. Play Rock On.
Once the video is over, display slide 23 and ask the students to determine what they think was the Point of Most Significance. You can choose to have them write this down on the back of their Patterns on Earth's Surface handout, or share out with the whole class.
Evaluate
Display slide 24 and pass back their First Word, Last Word activity from the engage phase of the lesson. Have your students review what they wrote at the start of the lesson. Let them know that they are going to revisit the phenomena and think about how their understanding has changed. Instruct them to think about one word that comes to mind when they watch the Incredible Krakatoa volcano eruptions at night again. This could end up being the same word as before, or it could be a new word entirely. This becomes the "last word." They will use this word in a few minutes.
Once the video is over, pass out a new sheet of blank paper. Display slide 25 as a reminder and an example of the activity. Using the word students came up with that relates to the topic, students should do the following:
Students write the last word vertically on the left side of the new page.
Students complete an acrostic poem using the last word. Encourage them to use full sentences in their responses, rather than single words.
(Optional) Have your students glue or tape their First Word, Last Word activities side-by-side on a long sheet of construction paper to display.
Resources
K20 Center. (n.d.). First word, last word. Strategies. https://learn.k20center.ou.edu/strategy/d9908066f654727934df7bf4f5069e86
K20 Center. (n.d.). POMS: point of most significance. Strategies. https://learn.k20center.ou.edu/strategy/b30762a7557ba0b391f207f4c600f5ac
K20 Center. (July 17, 2020). ICAP - Rock On. [Video] Youtube. https://www.youtube.com/watch?v=FfoQR0wMMhQ
Newsflare (Producer). (2019, November 3). Incredible Krakatoa volcano eruptions at night | anak krakatau 2018 [Video]. Youtube. https://www.youtube.com/watch?v=NGcbNn4Vk1w&feature=emb_err_woyt