
Summary
Students will examine evidence for glacial theory and other competing theories of the early 1800s. Students will read field journal excerpts from geologists as well as analyze the data collected from early Alpine expeditions.
Essential Question(s)
Overarching: What is the Nature of Science? Secondary: How can scientists use evidence to form plausible scientific theories and how do those theories change over time?
Snapshot
Engage
Students are given a scenario in which they have to make inferences from the evidence at hand and propose plausible theories using the Claims, Evidence, Reasoning (CER) model to explain what occurred.
Explore
Students participate in a simulation showing glacial movement and its results. Students view a real glacier flow time-lapse video over a 5-year period.
Explain
Students create a T-Chart explaining the similarities and the differences in their glacier model and real glacier movements. Students examine the evidence for modern day Glacial Theory.
Extend
Students investigate original glacial evidence from the 1830’s. Students "travel" along with Louis Agassiz on one of his field expeditions into the Alps. Students play the role of William Buckland, a Geologist in the early 1800’s, who was unsure about glacial theory. Students analyze the competing theories (glacial theory, diluvial theory, and drift theory) and test them against the available evidence at hand.
Evaluate
Students write a speech to the British Association for the Advancement of Science to explain why they either support or reject Glacial Theory and cite the evidence for or against the theory.
Materials
Tricky Tracks Slides
Case of the Missing Meatball handout (one per student)
Fossil Footprints handout (one per student or class set)
GAK (Follow attached instructions for making GAK, makes 3 cups) (1/2 cup – cup per group)
Paper towel tubes (one per group or one per class if done as demo)
Foil (to line tubes, one per group)
Small gravel (aquarium gravel works well, about 10-20 pieces of gravel per group)
Food coloring (enough to dye GAK)
Black marker (one per group)
(optional) iPad or other tablet with time-lapse app
Speech/Essay Rubric (1 per student)
Engage
Give students the Case of the Missing Meatball handout and have them write a Claim, Evidence, Reasoning (CER) statement for the scenario.
Tell students you are going to show them a series of pictures that tell a story. Explain that they will be making some observations about the pictures and using their observations to make some inferences. Show students the first panel of the footprints (use either the Tricky Track slides or Tricky Tracks student handouts). Have the students write down some observations.
Show students the second panel of the footprints picture. Allow students time to record their observations.
Show students the third panel and completed picture with all three panels.Have the students record their observations
Now ask students to talk with an Elbow Partner to discuss what possible scenarios could account for their observations. Have students write a CER statement for the scenario they think is most likely to have occurred. The students DO NOT have to have the same scenario as other students; there are multiple scenarios that can explain the footprints.
Explore
Assign students into groups of 2-4 depending on your available materials. Prepare the GAK ahead of time according to the attached instructions. (Option: If possible students can make the GAK themselves as part of the lesson.)
Cut the paper towel tube in half lengthwise so that you have two "open channels." These will serve as our valley for our glaciers to travel down.

Cover the channels with foil; this will keep the GAK from sticking to the valley. (Note: As a differentiation you can have groups create obstacles with balls of tape stuck to the cardboard. These would simulate rock and boulder outcroppings. )

Have the students use a marker to draw lines in the bottom of the valley. The marks should be about 1-2 cm apart. These marks will help the students to measure and detect the movement of their GAK glacier.

Use books or a cardboard box to prop up one end of the "valley" so that it will have a gentle slope. (Note: As a differentiation you could have different groups experiment to see how the angle of the slope affects the flow rate of the GAK glacier.) Have each group take equal amounts of the two different colors of GAK and layer like a stack of coins.

Have students put about 10-15 pieces of aquarium gravel in their GAK glacier, these will represent boulders that get moved hundreds of miles by glacial flows. Tell students they will place their layered GAK at the top of the valley, "open channel".
Make sure they note the time or use a stopwatch to record how long the glacier takes to flow. Once they have noted the time they can release their GAK glacier and watch it flow. (Note: Depending on the consistency of the GAK, room temperature, slope of the valley, etc. this could take 30-45 minutes to occur.)
When the students have completed the simulation have them record the time it took the glacier to reach the bottom of the valley. Instruct students to calculate the flow rate or speed by dividing the distance it traveled (the length of the valley) by the time it took to reach the bottom.
Example:
Distance = 30cm
Time = 45 min 25 sec (2725 seconds)
Flow rate(Speed) = 30cm/2725 secFlow rate(Speed)= 0.011cm/sec or 0.011 centimeters per second
Point out to students that this is extremely slow. Ask them if they would have been able to notice a difference in their glacier if they only looked at it two times about 10 seconds apart, and if they only looked at it in the beginning and the end. Show students one of these clips showing real glaciers flowing. Tell students that this time-lapse video was created over a 5 year period.
Explain
Instruct students to create a T-Chart for the similarities and differences between the simulation and the real glacial flow.

Have students share their responses in a class discussion. As they share begin to point out common features of glaciers that relate to their observations. You can do this by asking leading questions about their observation. You can also create a word list or word wall for the terms related to glaciers. As you discuss, point out the key terms and have the students write their own definition for each term in their science journal.
Glaciers move large boulders, rocks, and gravel, what would all this rock material do to the valley surface underneath the glacier?
What will happen over a long period of time if the glacier continues to scratch the ground?
The glaciers moved very slowly, what is causing them to move at all?
What caused the striations (stripes) in the glacier?
What do you think the different layers of GAK represented on a real glacier?
What would happen to all of the material the glacier moved down the valley? Where will it end up?
At this point show the students a diagram of a glacier and a glacial valley. Make sure to identify the features of the glacier and the key features it leaves behind in the valley.


The key features to point out include:
Moraine Types
Lateral moraine
End moraine
Medial moraine
Ground Moraine
Glacial Trough
Extend
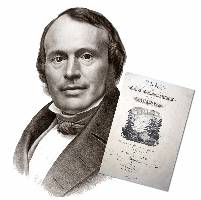
Place students in groups of 2-4. Explain that they will be looking at original evidence and field journal notes from Louis Agassiz and William Buckland from their expeditions into the Alps, Scotland, and England in the early to mid 1800s. They will be walking in the shoes of the scientist explorers who began to piece together the evidence for glacial theory.
Explain to students the two theories (diluvial theory and drift theory) that were most prevalent at the time and were later displaced due to the mounting evidence and support for glacial theory.
Give students copies of the attached Agassiz and Buckland Biographies. Have them read the bios using an analytical reading strategy such as thinking notes or Why-Lighting. Once they have read the bios lead a discussion about the two men and the timeframe (use the background information about diluvial and drift theory to assist). This discussion will set the stage for the significance of their historical expedition.
Tell students that they are going to go on an expedition into the Alps with Louis Agassiz and play the part of William Buckland who is skeptical of Agassiz’s Glacier theory. Hand out the attached Alpine Expedition Map and explain to students they will be visiting the same sites Agassiz and Buckland visited in 1838.
Inform them that as they visit each site they will be presented with evidence. Explain that they must document, write down, their observations in the attached 1838 Expedition Log handout.
Have students make inferences from their observations.
Observations Should include:
Scratches in the rocks
Polished surfaces
Soil and gravel piles (moraines)
Sample Inference:
Glaciers carrying boulders and gravel scratched the surface of the rocks.
Evaluate
Inform students they will be writing a speech/argumentative essay addressed to the British Association for the Advancement of Science of the early 1800s much like William Buckland did in support of Glacial theory.
Have students write an argumentative essay/speech in support of glacial theory. Tell them to be sure to use evidence from the text in support of their claims. Give students a copy of the rubric and explain to them what you will be looking for in the speech/essay.
Resources
K20 Center. (n.d.). Claim, Evidence, Reasoning (CER). Strategies. https://learn.k20center.ou.edu/strategy/156
K20 Center. (n.d.). Elbow Partners. Strategies. https://learn.k20center.ou.edu/strategy/116
K20 Center. (n.d.). T-Chart. Strategies. https://learn.k20center.ou.edu/strategy/86
K20 Center. (n.d.). Why-Lighting. Strategies. https://learn.k20center.ou.edu/strategy/128
University of Oklahoma History of Science Collection