

Summary
This lesson is a middle school adaptation of the high school lesson "How Does Your Garden Grow?" Students will explore principles of soil health, soil chemistry, nutrient cycles, and environmental impacts of soil quality and investigate optimal soil conditions for plant growth. Using the data and information collected throughout the lesson as evidence, students will create presentations to explain the relationship between soil health and plant growth.
Essential Question(s)
Why should we care about soil health?
Snapshot
Engage
Students examine photographs of healthy and unhealthy soils and crops and discuss what may have caused the differences between the images.
Explore
Students collect soil samples from a variety of locations and evaluate the pH and nutrient level of each sample. Students also explore and discuss information about healthy soil and practices that support healthy soil.
Explain
Students complete a digital breakout room using information about soil chemistry and nutrient cycles, then collaborate to make connections between soil health, management practices, and nutrient cycles.
Extend
Students grow plants in a variety of healthy and unhealthy soils to investigate soil conditions and soil management practices.
Evaluate
Students present the results of their soil health investigations and explain the relationship between soil health and plant growth.
Materials
Lesson Slides (attached)
Soil Investigation handout (attached; one per student)
Soil Hand Texture handout (attached; one per group)
Window Notes handout (attached; one per student)
Soil Conditions Experiment handout (attached; one per student)
Soil samples (collected during the lesson)
Gloves
Paper towels or disinfectant wipes
Mineral-free water (e.g., DI water)
Soil test kit or chemical test strips
Student devices with internet access
Sticky notes in three different colors
Posters
Markers
Engage
15 Minute(s)
Use the attached Lesson Slides to facilitate this lesson. Display slide 2 and introduce the title of the lesson, then display slides 3–4 and introduce the essential question and learning objectives.
Display slide 5 and introduce the Photo Deconstruction activity to students. Explain to students that they will see four photographs on the next slide. Tell students to study the four photos and consider the following questions:
What do you observe in each photo?
What are some causes of the things you observed?
What do the healthy plants have that the unhealthy plants do not have?
Tell students that as they study the photos they should attempt to answer all three questions in a single-sentence summary.
Show slide 6 containing a series of photographs of soil and plants in different soil conditions. The images illustrate the following:
Healthy, harvested wheat field
Bare field
Plants growing in healthy soil
Plants growing in unhealthy soil
Invite students to share out any observations and guide a class discussion on the images.
After the discussion, display slide 7. Ask students to summarize what they think they know about all four images in a single sentence. Explain their sentences should capture the main information they gained from the discussion. Invite volunteers to share their summaries.
Explore
30 Minute(s)
Part 1: Assessing Soil Chemistry
Display slide 8 and draw students’ attention to the soil samples. Inform students that they will be analyzing each soil sample using common soil chemistry tests. Explain to students that they will be testing the soil pH as well as the nitrogen level, phosphorus level, and potassium level.
Show slide 9 and explain the process for preparing the soil samples.
Begin by having students create the soil solution. Instruct them to add 100 mg of soil and 200 mL of water to a beaker or other container. Ensure that they measure both the soil and water correctly.
Instruct students to stir the mixture using stirring sticks or rods. Ensure that students use a new or different stirring utensil for each soil sample.
Once each mixture has been prepared, allow them to sit overnight.
In the following class period, resume the lesson by displaying slide 10. Review portions of the lesson from the previous class period and stress to students that soil is important to plant health.
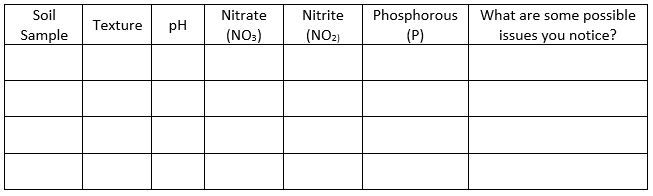
Pass out one copy of the attached Soil Investigation handout to each student. Additionally, provide each student with a Soil Hand Texture handout to assist them with the texture portion of the soil investigation. A copy of the Soil Investigation table can be seen below.
Explain the procedure for testing soil samples. This procedure may vary based on the types of soil test kits you purchased. Review the specific directions with students. Tell students that they should dip their test strips into the sample solution, allow 50–60 seconds for the test strip to change color, then compare the color of the test strip to the color chart. Tell them that each measurement should then be recorded in their Soil Investigation tables.
Tell students that they should document their process and results as they test the samples. They may do this by taking photos using tablets or their phone camera, if your classroom allows student devices. Explain to students that they will incorporate these pictures into their final presentations.
Instruct students to begin testing their soil samples. As they test the samples, walk around the room and assist students with the testing process. Answer any questions they may have and guide them in making observations about their samples, if necessary.
After the testing process is complete, display slide 11 and explain the clean-up process.
Part 2: Investigating Soil Health
Display slide 12 and introduce the next part of the lesson to students. Explain that students will explore several online resources to learn more about soil properties and soil health.
Transition to slide 13 and pass out the Window Notes handout to each student. Tell students that they will explore resources about soil health in a Wakelet. As they read each source, they will take Window Notes over soil health, but will leave the Nutrient Cycles portion of the handout empty. Direct students to access the Explore Sources Wakelet and begin reading through the resources.
Part 3: Discussion
After students have read the sources, display slide 14 and introduce the discussion portion of the lesson. On the class board or on a large sheet of paper, create an Anchor Chart for each quadrant of the Window Notes. Consider including diagrams or drawings of soil horizons as part of the chart.
Display slide 15 and begin a class discussion on students’ window notes. Use the following questions on the slide to guide the discussion:
What is soil?
How do we describe soil?
How do we know if soil is healthy?
What are the benefits of having healthy soil?
What soil management practices or strategies would improve soil health?
Explain
25 Minute(s)
Transition to slide 16 and introduce students the breakout rooms activity. Display slide 17 and direct students to the How Does Your Garden Grow? Breakout resource. Instruct students to form groups and collaborate to find the keys to the four digital locks at the bottom of the website. Explain that students should read all of the articles and images on the website and use information about how nutrients are cycled to find the keys to the digital locks. Instruct them to summarize the information they learn in the Nutrient Cycles quadrant of their Window Notes as they work. Explain that they may make additional notes or add more “windows” to their handout if necessary. Allow students time to complete the activity.
Display slide 18. Pass out three different-colored sticky notes to each student and introduce the Three Sticky Notes activity. Begin by having students summarize what they learned in the breakout activity using a single word. Display slide 19 and have students summarize the breakout activity using a short phrase.
Instruct students to use the information they gained from the breakout activity to create a new Anchor Chart for the Nutrient Cycles window on their Window Notes handout.
Display slide 20 and invite students to share out their words and phrases. As students share, add any new information to the three Anchor Charts created during the discussion from the Explore phase of the lesson.
Display slide 21 and direct students’ attention to their third sticky notes. Assist them in synthesizing the many concepts from the activity, paying extra attention to the connections between the knowledge they gained from the activities during the Explore and Explain phases of the lesson. Guide students to make the following connections about soil and nutrient cycles:
Nutrient cycles and soil health are related. For example, nutrient cycles support healthy soil, and unhealthy soil may disrupt nutrient cycles.
Soil management practices support or supplement natural nutrient cycles.
Soil management practices impact soil health.
After supporting students in making these connections, instruct them to summarize how nutrient cycles, soil health, and soil management practices relate to each other using one sentence.
Extend
30 Minute(s)
Display slide 22 and give each student one copy of the attached Soil Conditions Experiment handout. Have students generate a question about which soil conditions (e.g., pH, N) will provide optimal resources for a particular plant to grow, and have them record this question in the box at the top of their handouts. You may also suggest that students consider how a soil management strategy affects plant growth in addition to, or instead of, soil conditions.
Display slide 23 and introduce your class-specific instructions for the investigations and research associated with the activity.
Show slide 24 and provide students with the materials for the soil experiments. Have students complete the following set-up steps on the slide:
Punch holes in the bottom of the plastic cups for water to drain out.
Fill each cup with soil.
Plant seeds in each cup.
Create a schedule for watering and lighting.
Show slide 25 and have students create a plan for data collection and evaluation. Guide students to determine a method for taking consistent pictures of the plants throughout the experiment. Discuss factors like the height of the camera, distance from the plant, and camera orientation.
Evaluate
25 Minute(s)
Display slide 26. Explain to students that they must present the results of their investigations. Tell them that their presentations must explain the relationship between soil health and the growth of their plants. Explain that their presentations must provide an explanation for how soil health, nutrient cycles, and plant needs interact to impact plant growth.
If students’ investigations focused on improving soil conditions, have them emphasize how the best soil had or developed the right resources to meet the plant’s needs (e.g., healthy soil has lots of bacteria which decompose plants and animals to add nitrogen to the soil for plants to use).
If students’ investigations focused on improving soil management, have them emphasize how their management method connects to, fixes, or supports nutrient cycles to make the soil healthier (e.g., adding peroxide puts more oxygen into the soil which helps it compact so it water drains better).
Show slide 27. Review presentation parameters for student presentations on soil management practices and plant growth.
Resources
Food and Agriculture Organization of the United Nations. (2015). Our soils under threat [Infographic]. http://www.fao.org/resources/infographics/infographics-details/en/c/326257/
Food and Agriculture Organization of the United Nations. (2015). Soil is a non-renewable resource [Infographic]. https://openknowledge.fao.org/server/api/core/bitstreams/c43bacdd-2fb6-46d2-b9d0-6731c566be91/content
Food and Agriculture Organization of the United Nations. (2015). Soils help to combat and adapt to climate change [Infographic]. https://openknowledge.fao.org/items/5230354d-be82-46fd-89b5-4d07f1493d8f
K20 Center. (n.d.). Anchor charts. Strategies. https://learn.k20center.ou.edu/strategy/58
K20 Center. (n.d.). How does your garden grow breakout. https://sites.google.com/ou.edu/gardengrowbreakout/home
K20 Center. (n.d.). Photo or picture deconstruction. Strategy. https://learn.k20center.ou.edu/strategy/140
K20 Center. (n.d.). Three sticky notes. Strategies. https://learn.k20center.ou.edu/strategy/153
K20 Center. (n.d.). Wakelet. Tech Tool. https://learn.k20center.ou.edu/tech-tool/2180
K20 Center. (n.d.). Window notes. Strategy. https://learn.k20center.ou.edu/strategy/189
Thien, S. J. (1979). A flow diagram for teaching texture by feel analysis. Journal of Agronomic Education, 8(1), 54–55.

